Introduction
Git is a distributed version control system designed for ensuring code integrity and maintaining a complete history of revisions.
It is an essential tool for many developers, allowing them to track changes, collaborate with others, and manage code in a structured manner.
This documentation aims to provide a comprehensive understanding of Git’s core functionality and good practices for clear and efficient collaboration during coding projects.
This documentation is made for an audience with a basic understanding of git.
Git can be used both through Terminal command line and RStudio programming interface or other tools (Github Desktop).
Please be aware that certain operations are not fully supported or are only partially covered by the RStudio interface. In these cases, utilizing the command line may be the only viable approach.
The present document focuses on general practices for using Git.
As our understanding and methodologies evolve, specific guidance tailored to clinical standards, project requirements, and FDA compliance in relation to source code and data management in clinical research will be developed and shared.
Installation
If you never used Git or GitHub before, start by creating a GitHub account and configuring Git.
GitHub is a platform for git-managed projects that allows developers to store, manage, and track changes to their code to nurture collaboration.
Other alternative such as Gitlab and Bitbucket exist.
To create a github account:
You can create a github account Here
To install git:
You can install Git on your local machine Here
Git is often already installed in internal company environments.
Initial setup: Configuration SSH key on RStudio and GitHub
When integrating GitHub with RStudio, we need to establish a secure connection.
SSH (Secure Shell) keys are the preferred method for this secure authentication. SSH keys operate on a key pair system:
Private Key: This is kept secret on your computer.
Public Key: This is shared with services like GitHub.
When you use Git to push code or pull changes from GitHub, it checks your SSH key. If your public key matches the private key on your computer, GitHub knows it’s really you. This is safer than an username/password because the keys are much harder to hack.
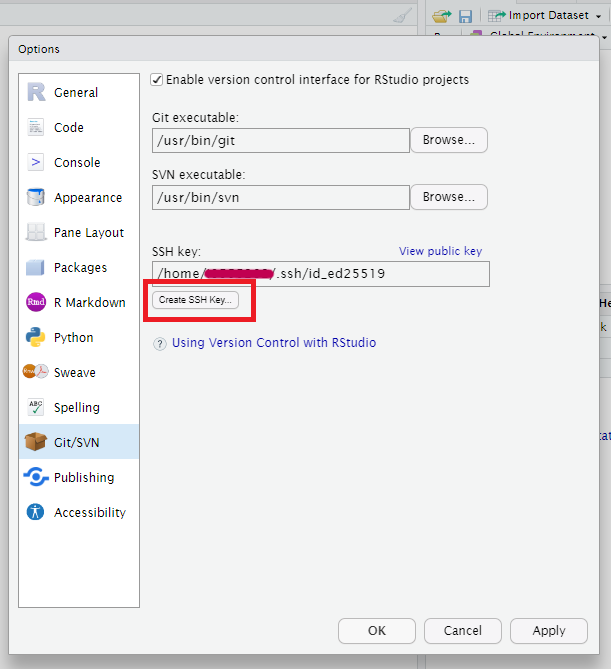
Only if you do not have SSH key
To securely and conveniently interact with GitHub repositories in RStudio, you should generate an SSH key and add it to your GitHub account, which allows passwordless authentication for Git operations.
- On RStudio, Create a SSH key in Tools > Global Option > Git/SVN > “Create RSA SSH key”
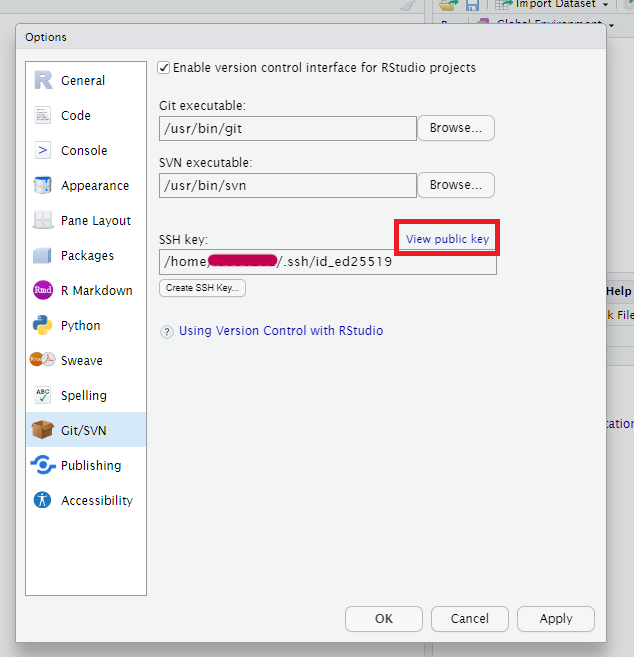
Copy and paste the key into your GitHub profile as:
- Copy your ssh key in RStudio: Tools > Global Option > Git/SVN > “View public key”
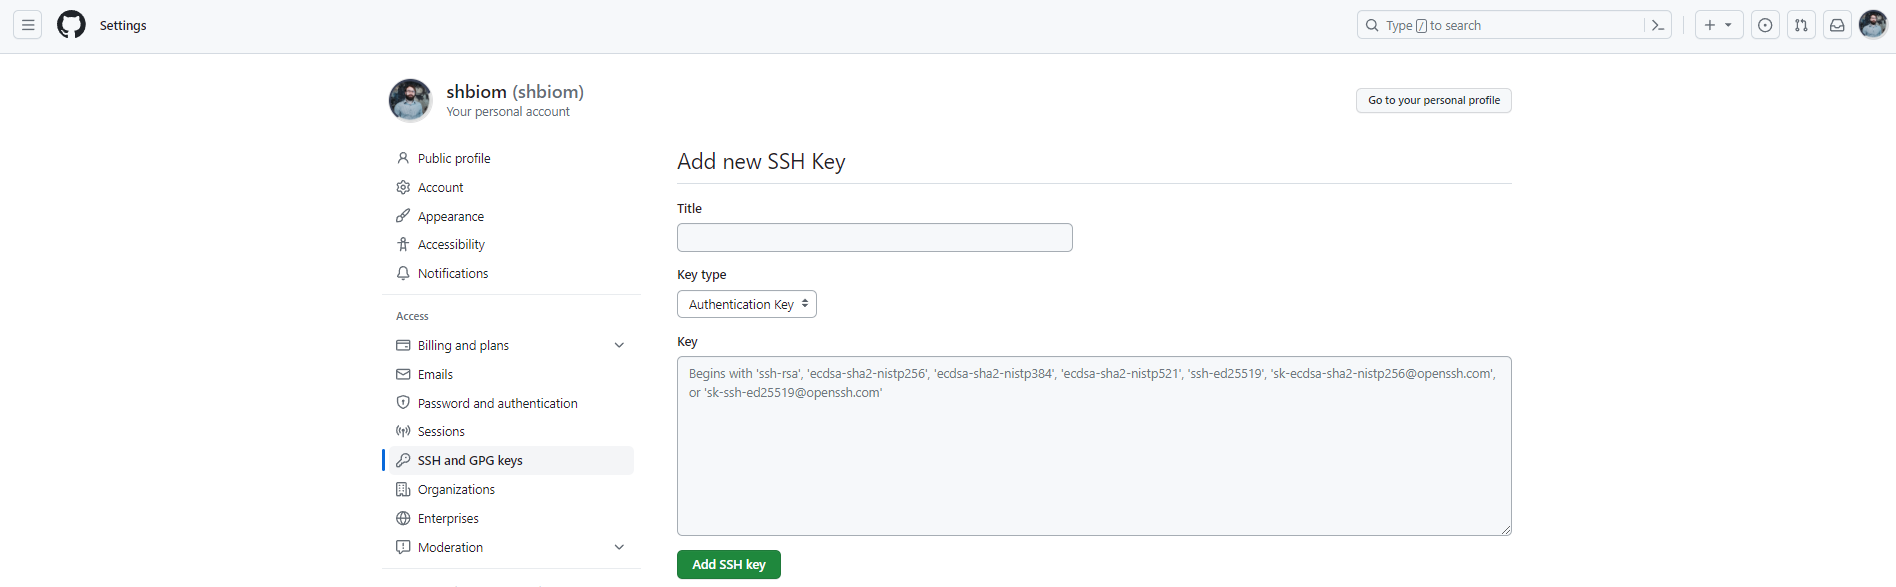
- Go to your
GitHubaccount and paste your key in: profile: Settings > SSH and GPG keys > New SSH key
The SSH begins with ‘ssh-rsa’, ‘ecdsa-sha2-nistp256’, ‘ecdsa-sha2-nistp384’, ‘ecdsa-sha2-nistp521’, ‘ssh-ed25519’, ‘sk-ecdsa-sha2-nistp256@openssh.com’, or ‘sk-ssh-ed25519@openssh.com’
Do not forget to add a Title
Add SSH key
After installing Git, you might need to configure your username and email address.
Open a terminal (or Git Bash on Windows).
Configure your user name and email address by running:
Terminal
git config --global user.name "Your Name"
git config --global user.email "your_email@example.com"
Use the email associated with your GitHub account.
You can check your configuration setting with:
Terminal
git config --global --listOn RStudio, go to Tools -> Global Options -> Git/SVN and make sure RStudio detected the Git executable.
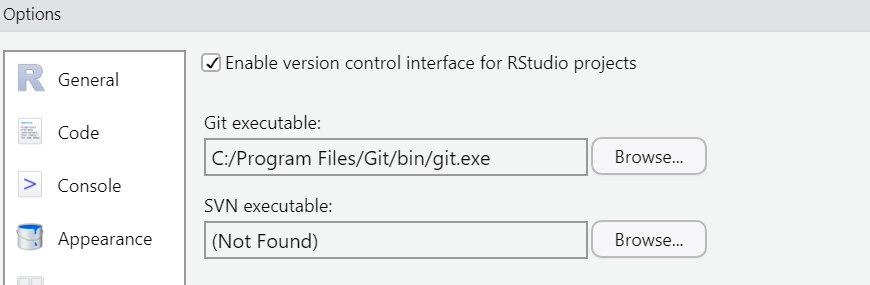
If not, you may need to manually specify the path to the Git executable manually.
The next section will describe basic operation for git code versioning and project hosted on GitHub
Git and Github: first steps
Git is the technology allowing you to use version system for your project. A project tracked with git is called a repository
Github is a host that allowing you to store your project manage with git (a repository!) along with others services.
You can either create a new repository from scratch or join a project that already have a github repository. Here how you below do it.
Github repository creation
To create a new remote repository you can either:
Create a local repository locally via Rstudio and send it to github (This is called a
Push).Create a remote repository on
GitHubimport it locally on your computer (This is called aClone).
Clone the Repository in RStudio
Cloning a repository will download the remote project locally
- On RStudio interface: Files > new project > Global Option create a new project and select the
Version controloption

- Select Git option
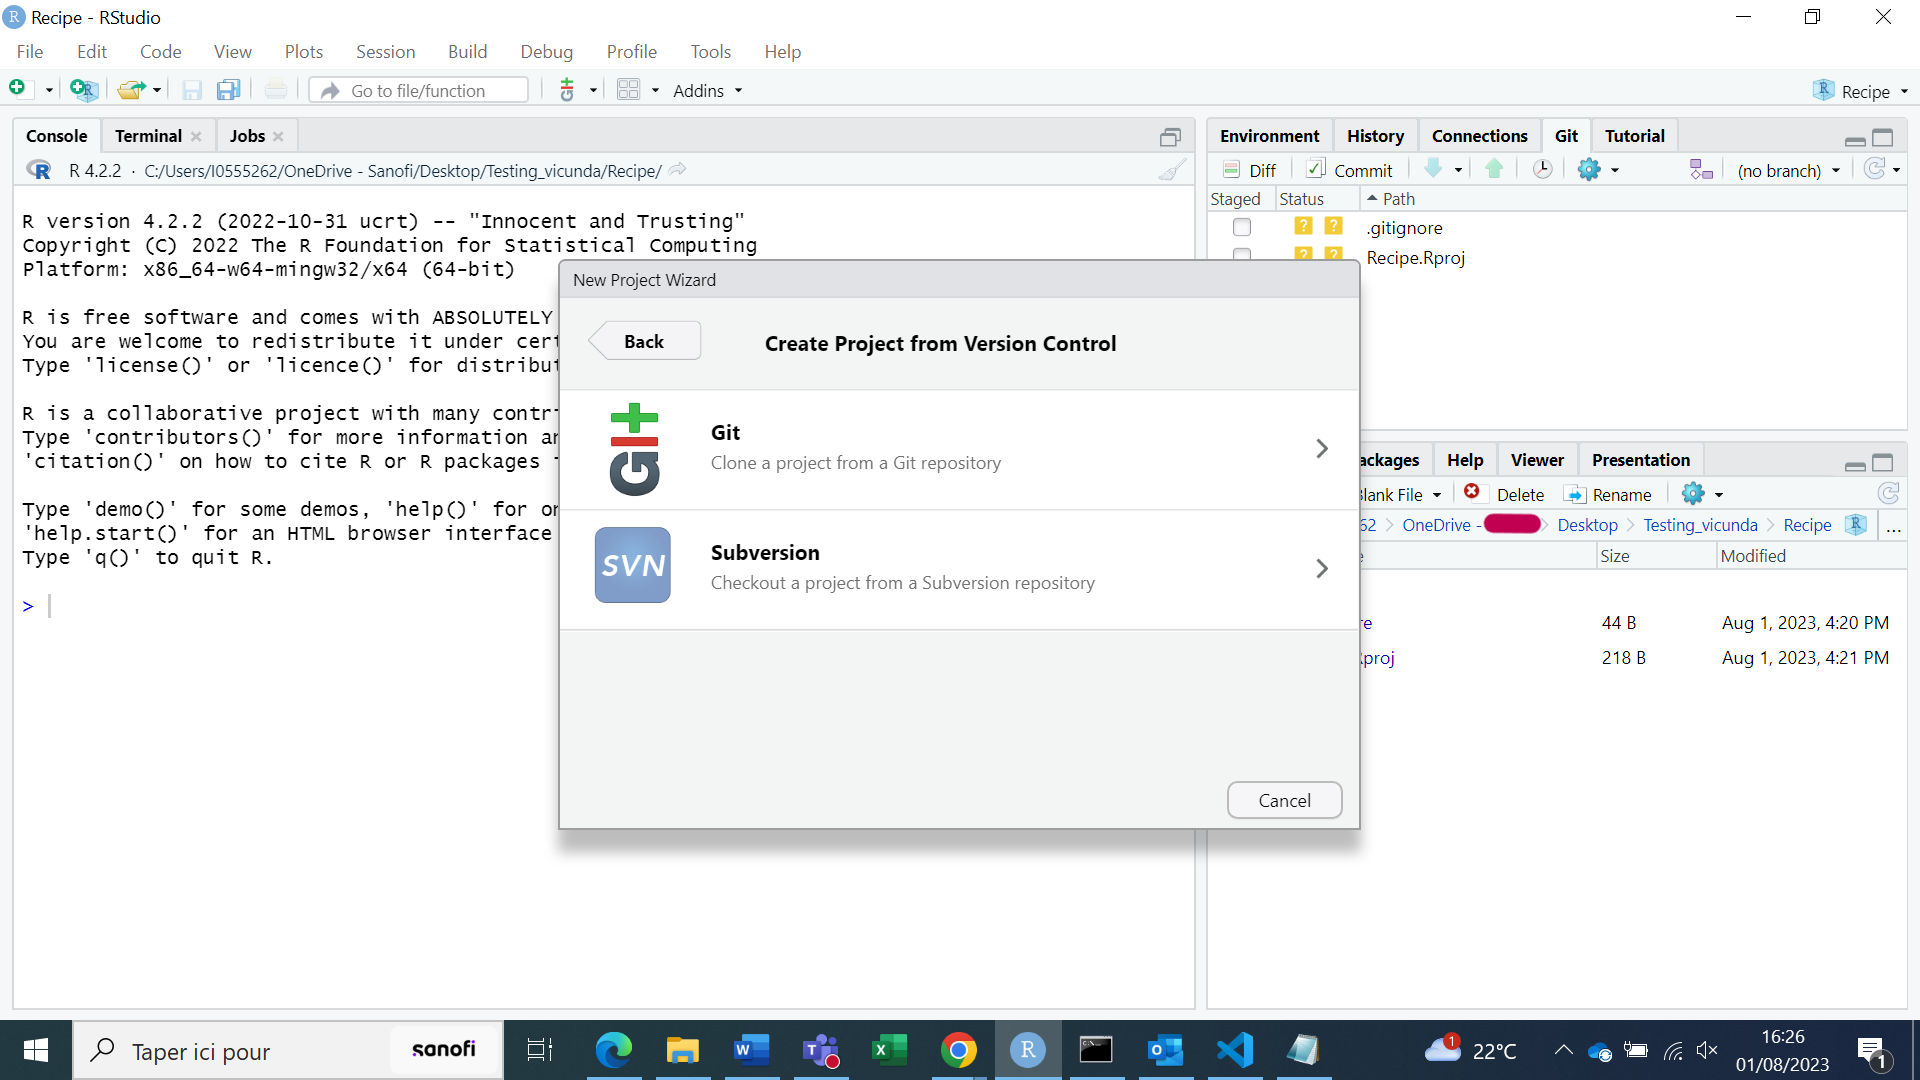
- Add the link to the
GitHubrepository in the repository URL
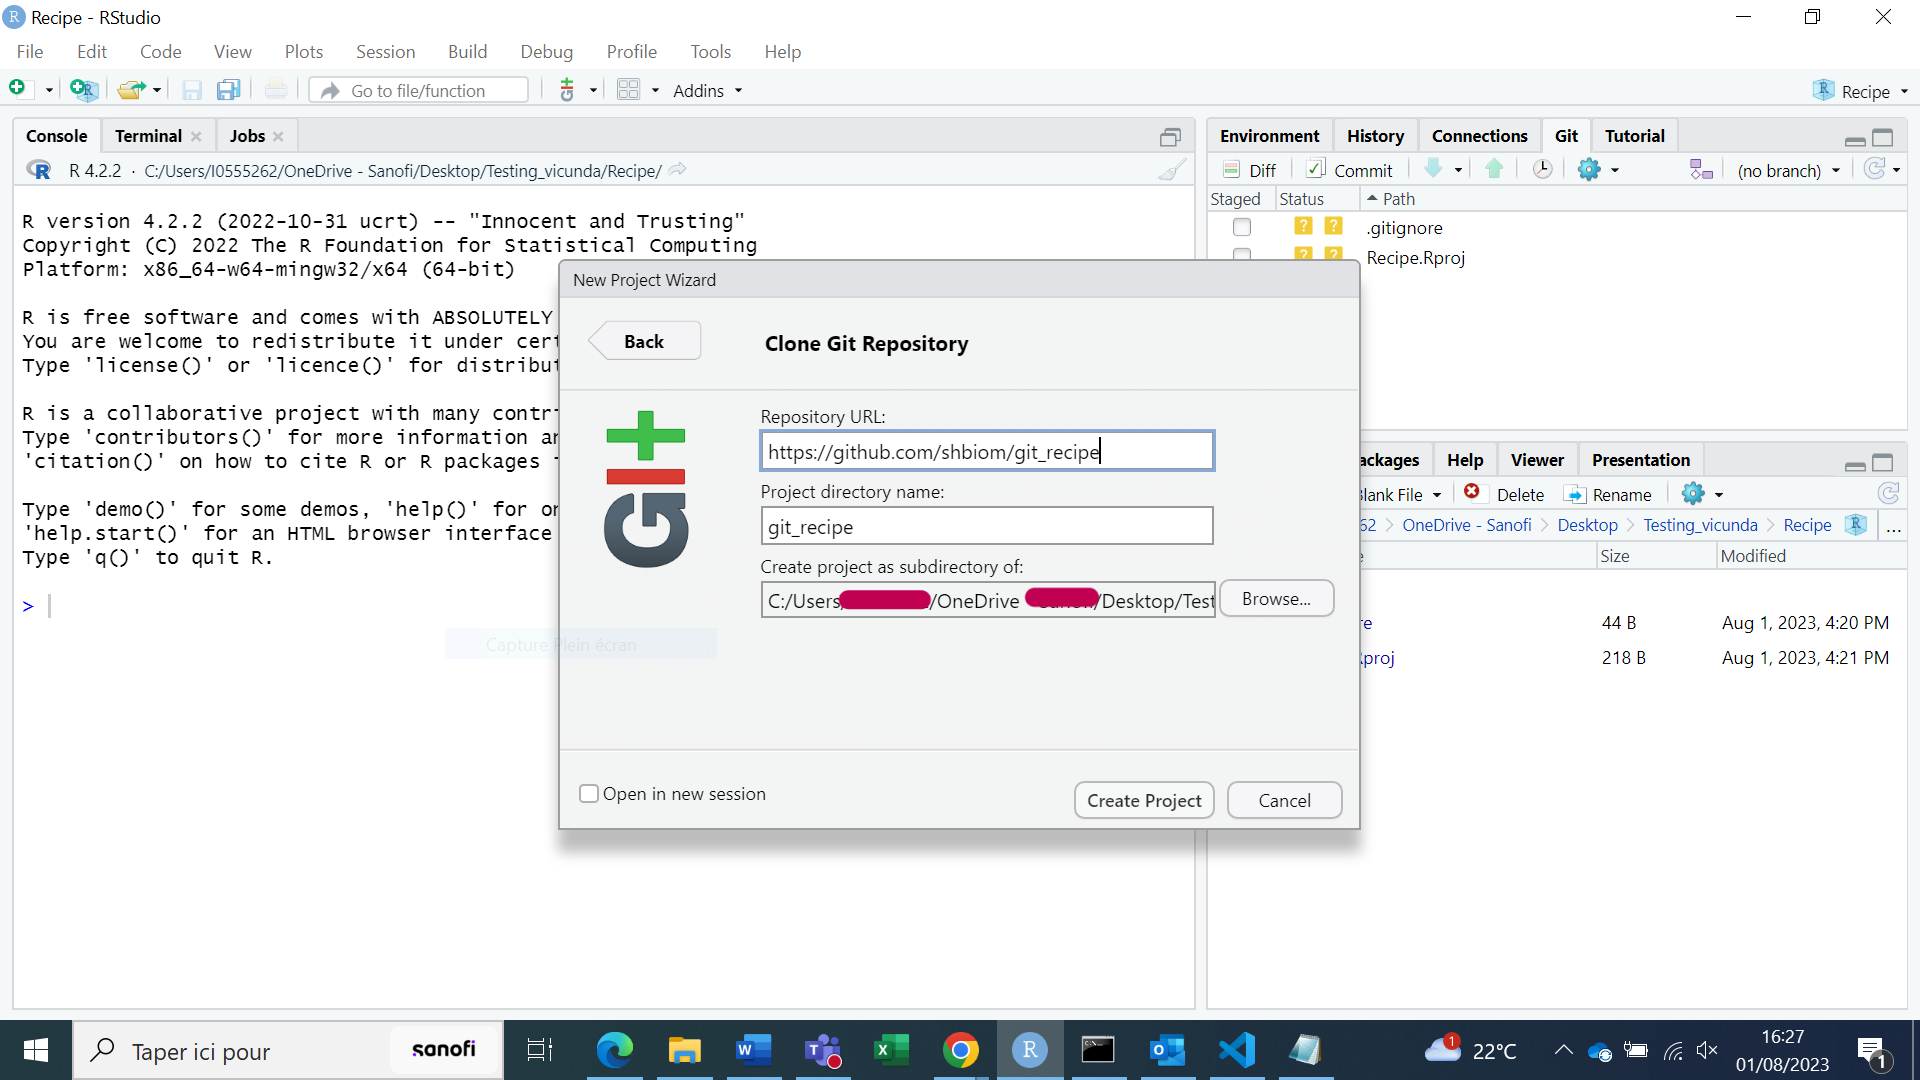
You can clone using SSH (often required by companies) or HTTPS.
RStudio run this command for us to clone the remote repository
Terminal
git clone REPO_URL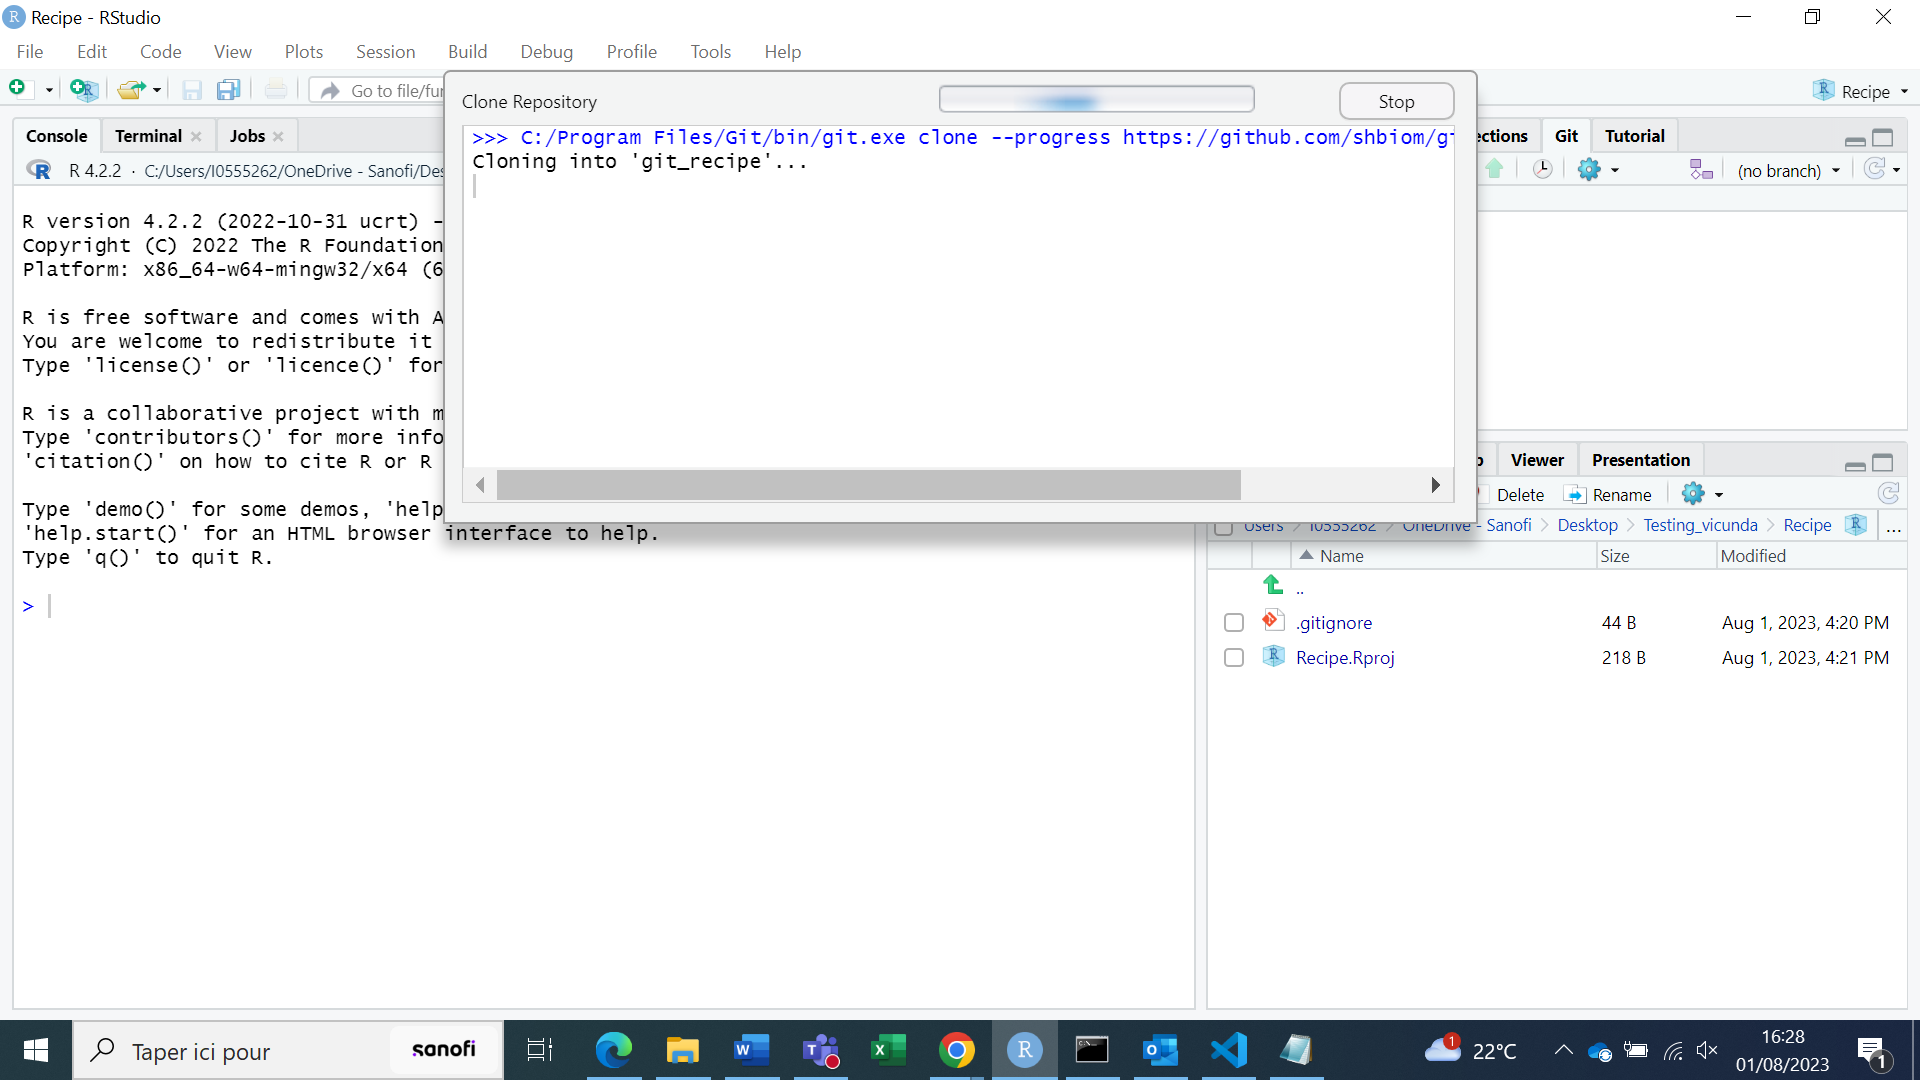
When a new project is created, RStudio automatically:
Initiates Git and fetches all remote branches and pulls the default branch (e.g. master) into your directory.
Creates a project file (with an .Rproj extension) within the project directory. This file contains various project options and can also be used as a shortcut for opening the project directly from the filesystem.
Creates a hidden directory (named .Rproj.user) where project-specific temporary files (e.g. auto-saved source documents, window-state, etc.) are stored. This directory is also automatically added to .Rbuildignore, .gitignore, etc. if required.
Loads the project into RStudio and display its name in the Projects toolbar (which is located on the far right side of the main toolbar)
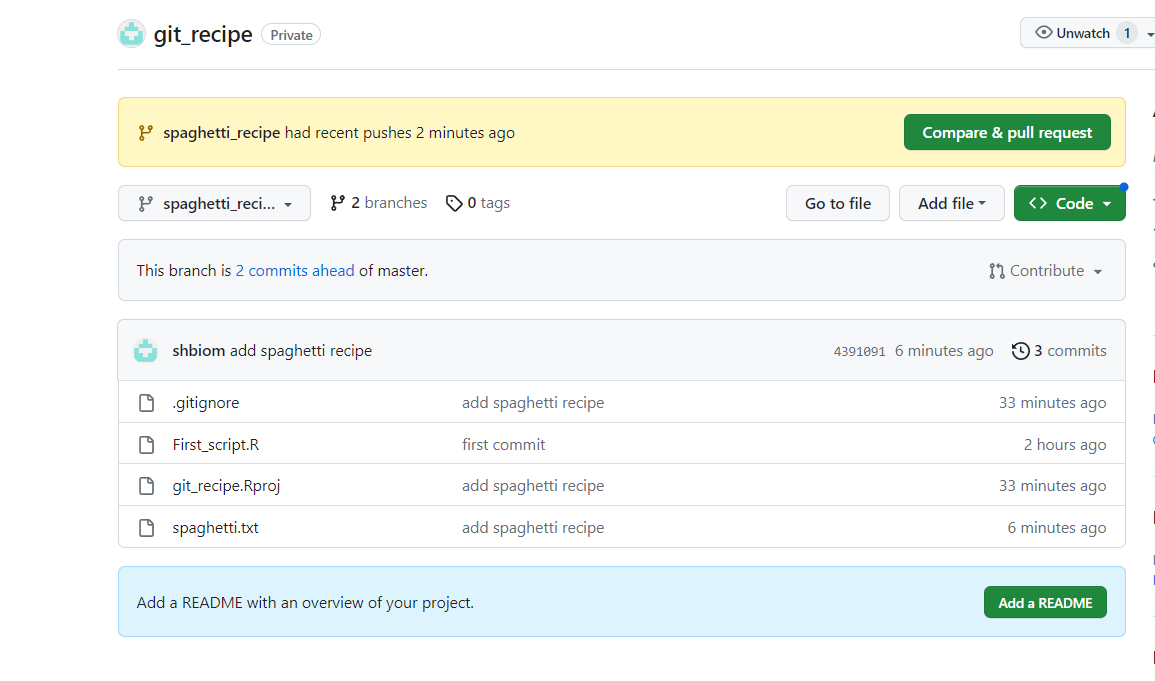
Create a New Branch
In Git, creating branches is a key strategy for effective collaboration. A branch is a copy of the main codebase from the default branch (commonly called main or master branch), allowing developers to work on new features separately without affecting the primary code.
When the feature on this branch is ready, it can be carefully reviewed and tested, then merged into the main codebase.
It’s common to have one branch per feature, often corresponding to a single developer’s work.
Branch names should be concise, explicit, and should always be in lowercase to ensure clarity and consistency.
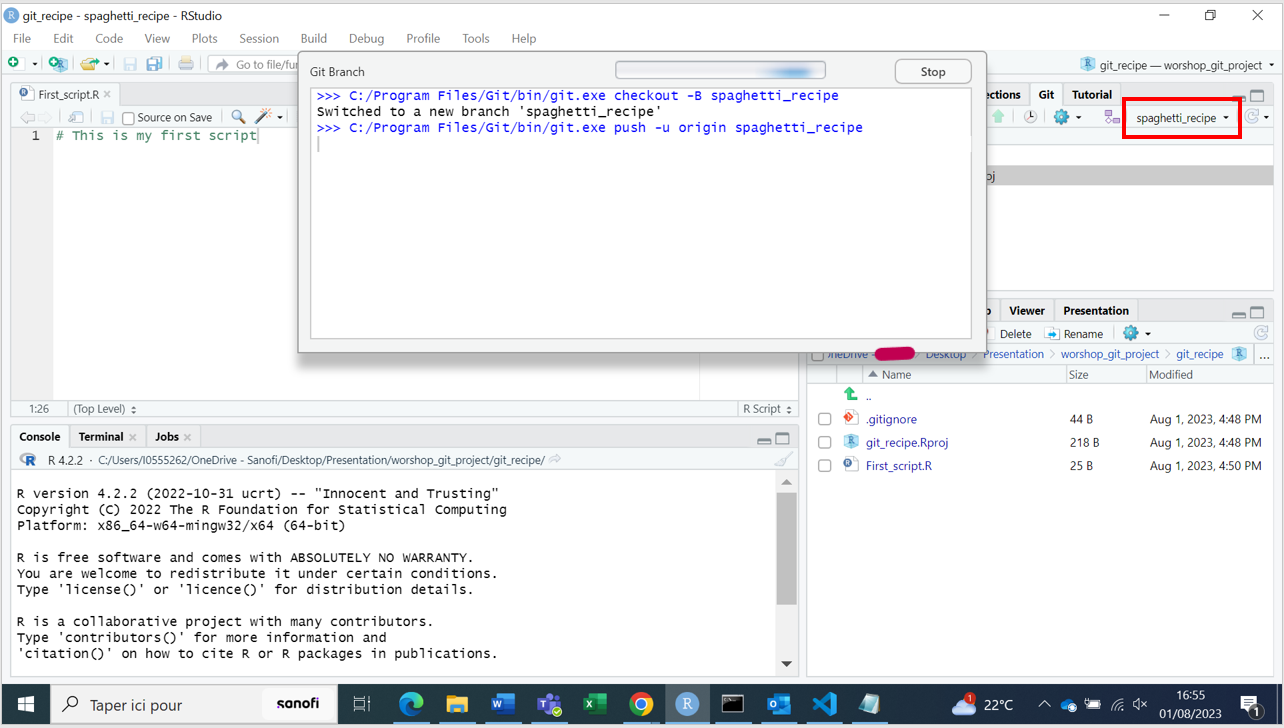
To create your first local branch :
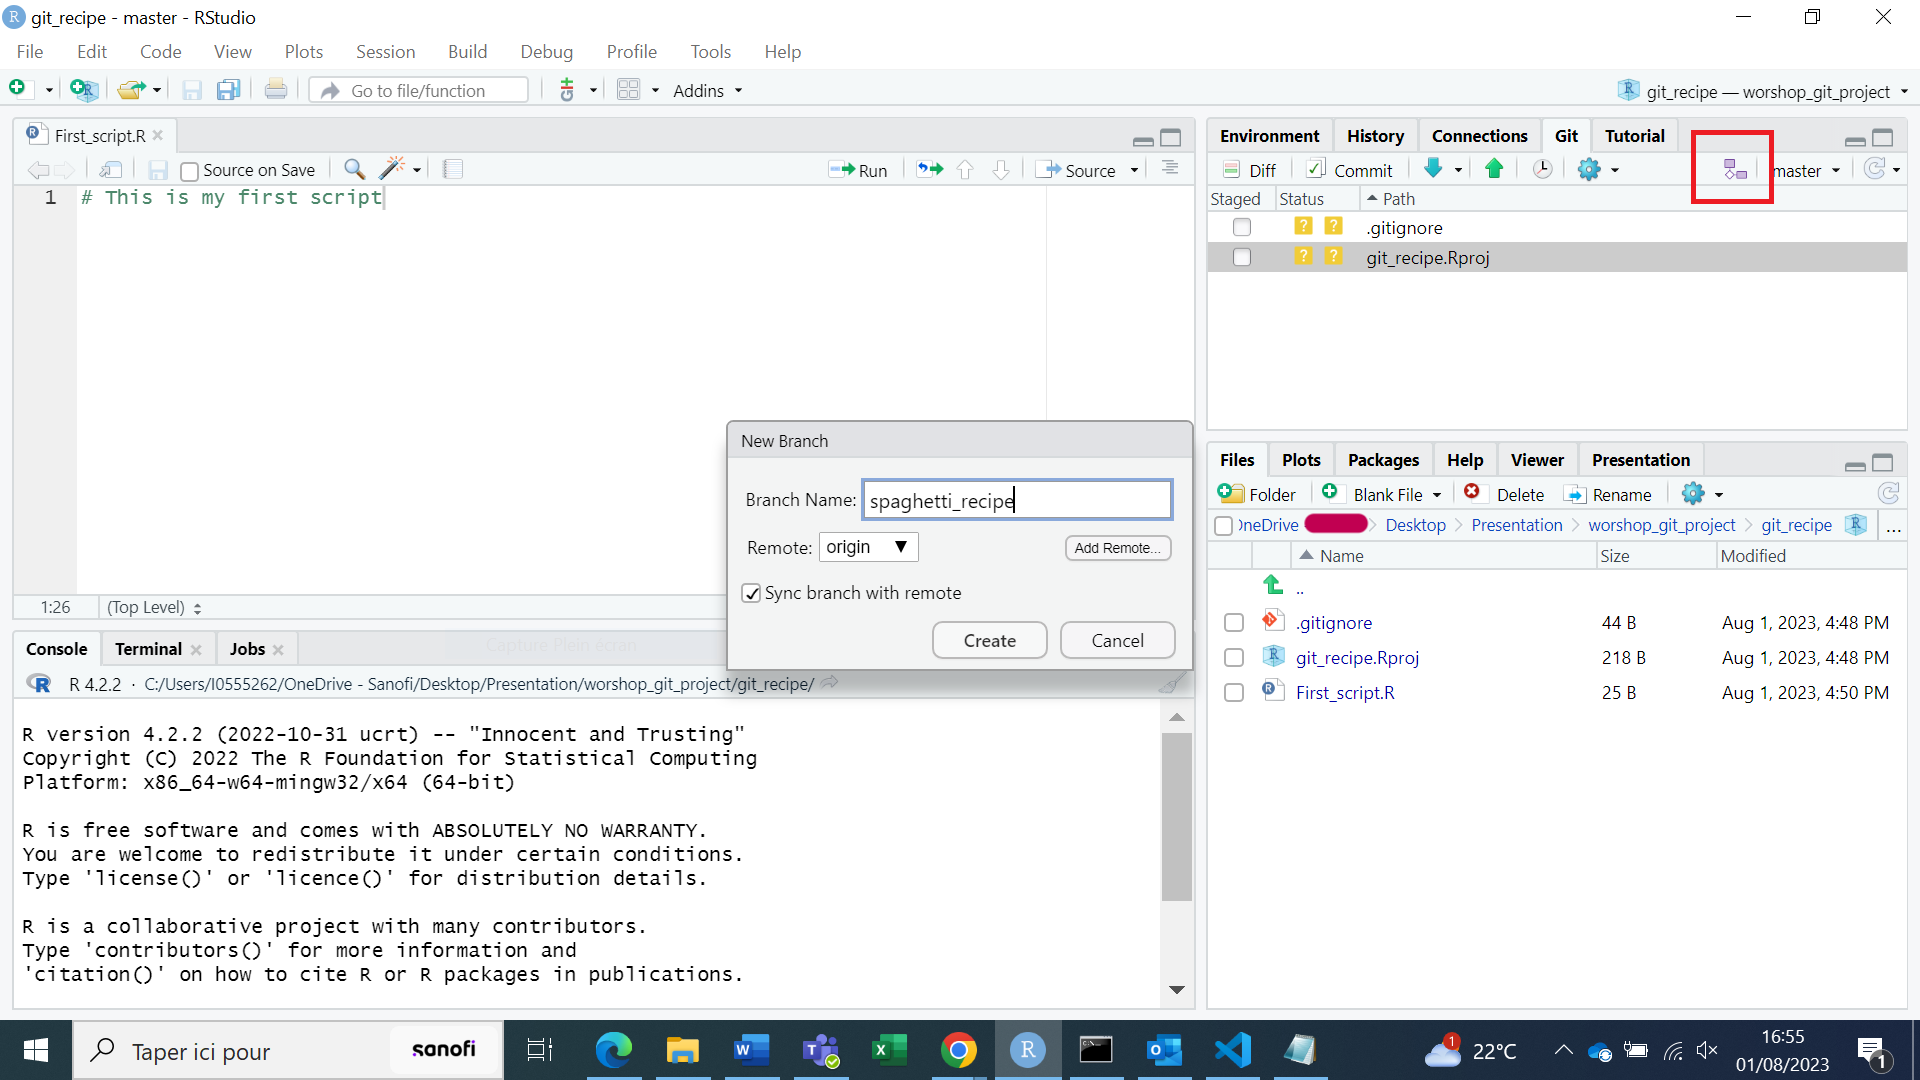
RStudio run this command for us to create a new branch:
Terminal
git checkout -b BRANCH_NAMEYou should be able to see a new branch now Here :
Always try to be aware on which branch your working on
BIS:Create New Branch from an github Issue
It is strongly recommended to create a branch from a github Issue.
A GitHub issue is a tool used within the GitHub platform to track ideas, enhancements, tasks, or bugs. It acts as a discussion forum for managing and discussing these topics among team members.
Basically, this is a way to provide feedback for collaboration and organization in the project.
To create an issue, follow these steps:
- Click on report an issue/edit this page

This will send you to the github repository in the Issues session.
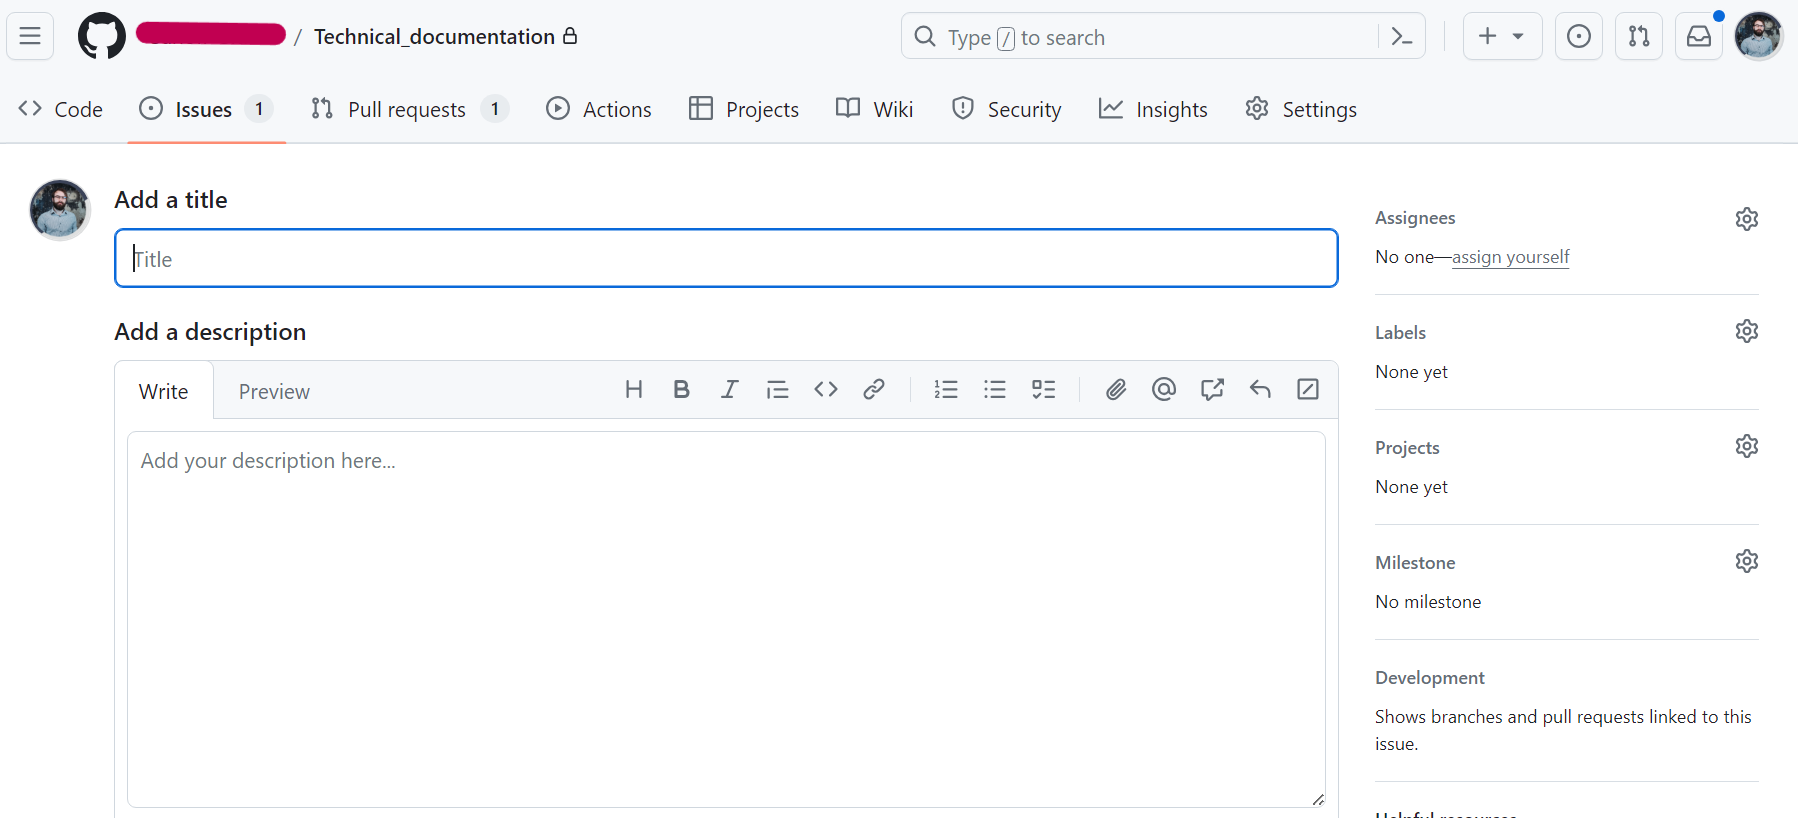
- Create a GitHub Issue: Navigate to the project’s GitHub page and click on the
Issuestab. There, you can create a new issue. See the example below for reference:
Before submitting an issue, please:
Check for Existing Issues: Ensure that a similar issue doesn’t already exist.
Use Descriptive Titles: Keep your issue titles concise yet descriptive (example: add_spaghetti_recipe)
Add an appropriate labels (bug, documentation)
Assign someone to this Issue

- Submit your issue
Privacy Note: Be aware that your issue will be publicly visible.
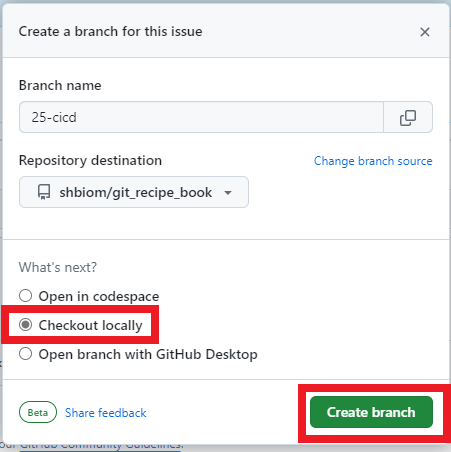
Now lets create a branch from github Issue:
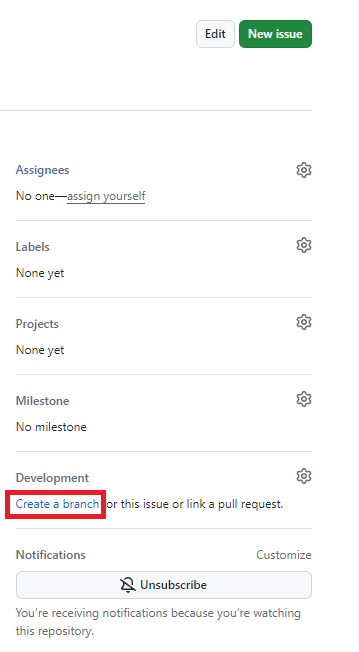
Then, create a branch from the Github Issues as below:
Commit message
Each commit is associated with a commit message describing the committed changes.
In the git tab, click on “Commit”. Select the modified file and click on “commit” with a message to commit your change.
Always try to Commit changes with a meaningful message as this is better for having a clear git history and help collaborators/reviewers understand the code changes.
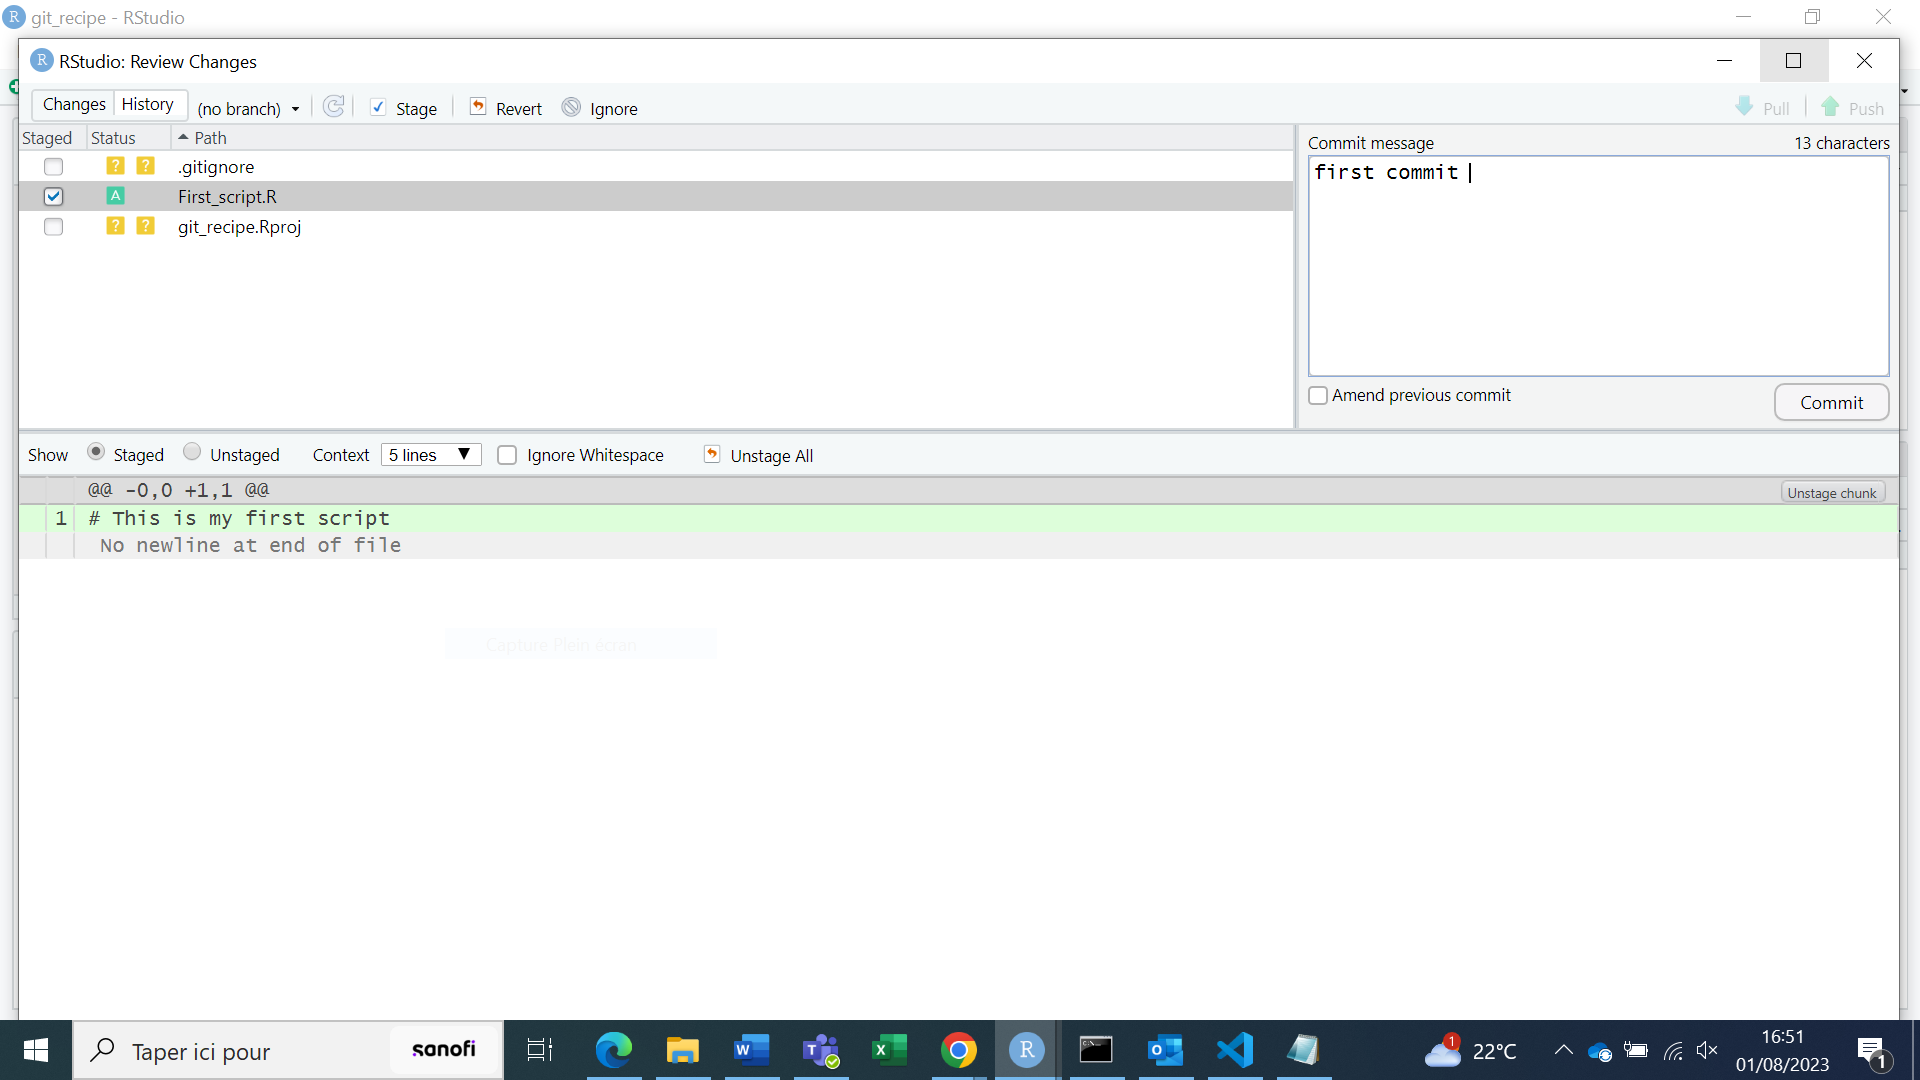
RStudio runs this command for us
Terminal
git add .
git commit -m MEANINGFUL_MESSAGE
This is the best way to communicate context about a change to other developers (or to yourself) working on that project now or in the future.
A Git repository is not a backup system and randomly committing code changes to capture the current state of your work could make the code history difficult to comprehend.
Avoid treating Git as a backup tool by committing unstructured or excessive snapshots
Commits should be clear, concise, and organized into logical units.
How to Write Good Commit Message:
Capitalized, short (50 chars or less) summary

More detailed explanatory text, if necessary. Wrap it to about 72 characters or so. In some contexts, the first line is treated as the subject of an email and the rest of the text as the body. The blank line separating the summary from the body is critical (unless you omit the body entirely); tools like rebase can get confused if you run the two together.

Write your commit message in the imperative: "Fix bug" and not "Fixed bug" or "Fixes bug." This convention matches up with commit messages generated by commands like git merge and git revert.

Further paragraphs come after blank lines.

Bullet points are okay, too

Typically a hyphen or asterisk is used for the bullet, followed by a single space, with blank lines in between, but conventions vary here

Use a hanging indent

If you use an issue tracker, add a reference(s) to them at the bottom, like so:

Resolves: #123Create a Pull Request
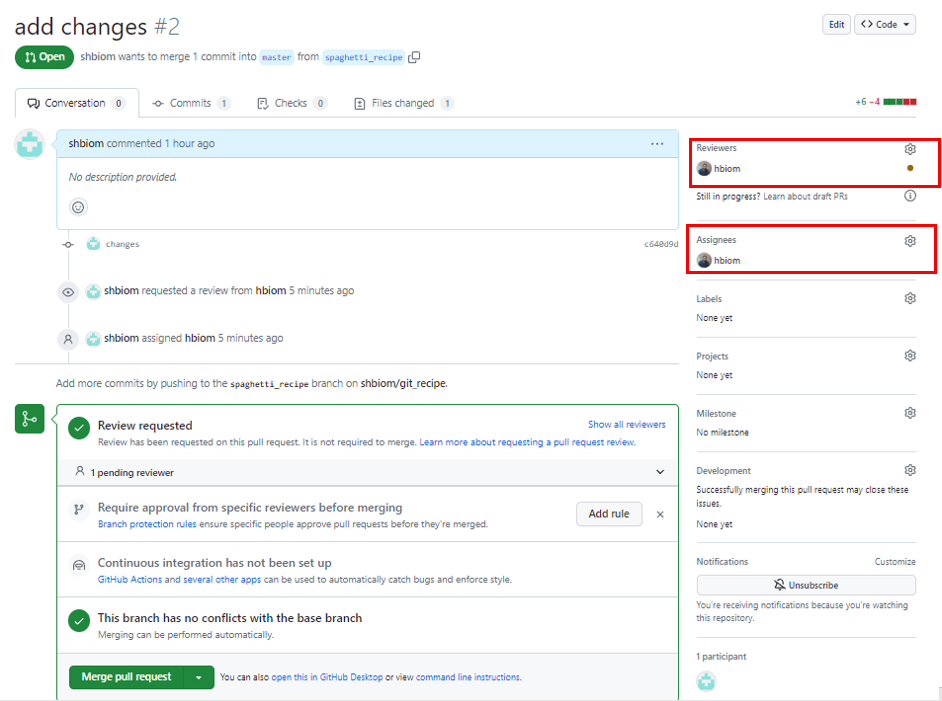
When a feature is completed on a branch, it is ready to be integrated into the common codebase on the default branch (commonly called main or master branch). This integration process requires the creation of a Pull Request (PR).
A Pull Request, or PR, is essentially a proposal to merge changes from one branch into the master branch. This merging process typically takes place after the changes have been reviewed and approved by another coder, who is designated as the reviewer.
The purpose of this procedure is to prevent errors from being merged into the master branch, thereby maintaining the integrity and quality of the codebase.
- Request the PR with
Compare & pull request
- Assign a reviewer
Documentation
Each project requires documentation to help users and contributors understand what the project is about, how to set it up, and how to use it.
This makes it easier for people to use the project and contribute to it. github repository project generally contains:
Readme
README is a document used in a repository to provide essential information about the project. It typically includes a brief introduction to the project, setup instructions, usage guidelines, contribution process, licensing details, and contact information for the maintainers.
The goal of this document is to allow a new user to quickly understand an overview and any critical information about the project stored in a convenient place.
.gitignore
.gitignore is a text file that tells Git which files or directories to ignore in a project. This could include sensitive information (API key, password) or unwanted files.
NEVER commit sensitive information: Ensure that you haven’t accidentally included any confidential data, API keys, passwords, or other secrets in your code. Otherwise, this information will be visible in the Git history.